21. Exercise: Single Device Notifications
L1 A21 Sending FCM Notifications To A Single Device
Exercise
- Open AndroidManifest.xml and uncomment the following code following
TODO: 3.0to enable theMyFirebaseMessagingServicefor the egg timer app. The service meta-data in the android manifest registersMyFirebaseMessagingServiceas a service and adds an intent filter so this service will receive messages sent from FCM. The last part of the metadata declaresbreakfast_notification_channel_idasdefault_notification_channel_idfor Firebase. You will be using this id in the next step.
<!-- AndroidManifest.xml -->
<!-- TODO: Step 3.0 uncomment to start the service  -->

        <service
                android:name=".MyFirebaseMessagingService"
                android:exported="false">
            <intent-filter>
                <action android:name="com.google.firebase.MESSAGING_EVENT"/>
            </intent-filter>
        </service>
        <!-- [START fcm_default_icon] -->
        <!--
 Set custom default icon. This is used when no icon is set for incoming notification messages.
             See README(https://goo.gl/l4GJaQ) for more.
        -->
        <meta-data
                android:name="com.google.firebase.messaging.default_notification_icon"
                android:resource="@drawable/common_google_signin_btn_icon_dark"/>
        <!--
 Set color used with incoming notification messages. This is used when no color is set for the incoming
             notification message. See README(https://goo.gl/6BKBk7) for more.
        -->
        <meta-data
                android:name="com.google.firebase.messaging.default_notification_color"
                android:resource="@color/colorAccent"/> <!-- [END fcm_default_icon] -->
        <!-- [START fcm_default_channel] -->
        <meta-data
            android:name="com.google.firebase.messaging.default_notification_channel_id"
            android:value="@string/breakfast_notification_channel_id" />
<!-- [END fcm_default_channel] -->- It is a good idea to create a new notification channel for the FCM since your users may want to enable/disable egg timer or FCM push notifications separately. Open
EggTimerFragment.ktand inonCreateView()create a new channel with breakfast channel id and the breakfast channel name from string resources.
// EggTimerFragment.kt

   // TODO: Step 3.1 create a new channel for FCM
    createChannel(
        getString(R.string.breakfast_notification_channel_id),
        getString(R.string.breakfast_notification_channel_name)
    )
The code for FCM part of this lesson is given in
MyFirebaseMessagingService.kt. In the following steps you will add code to your android app.
Open
MyFirebaseMessagingService.ktwhich extendsfirebasemessagingService. You enables this service in the first step. Now override theonNewToken()function and add a log to print the token. This code will print the registration token to logcat, everytime a new token is received.In most cases you may want to store this token. Let’s pretend
sendRegistrationToServerfunction does that. Call this function with the token after printing the log.
// MyFirebaseMessagingService.kt

   // TODO: Step 3.2 log registration token
    // [START on_new_token]
    /**
     * Called if InstanceID token is updated. This may occur if the security of
     * the previous token had been compromised. Note that this is called when the InstanceID token
     * is initially generated so this is where you would retrieve the token.
     */
    override fun onNewToken(token: String?) {
        Log.d(TAG, "Refreshed token: $token")

        // If you want to send messages to this application instance or
        // manage this apps subscriptions on the server side, send the
        // Instance ID token to your app server.
        sendRegistrationToServer(token)
    }
// [END on_new_token]onNewTokenfunction will be called when a new token is generated. Now if you run the egg timer app and observelogcatby filtering token(View > Tool Windows > Logcat), you should see a log line showing your token similar to this:
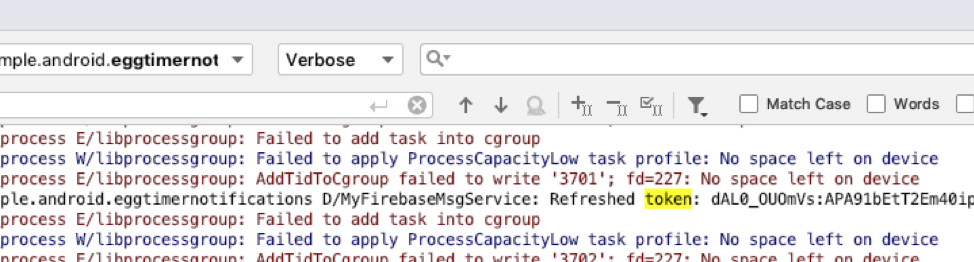
This is the token you need in order to send a message to this device. This function is only called when a new token is created. If you do not see the log with the token, your app may already have received the token before. In that case, uninstalling the app will help you to receive a new token.
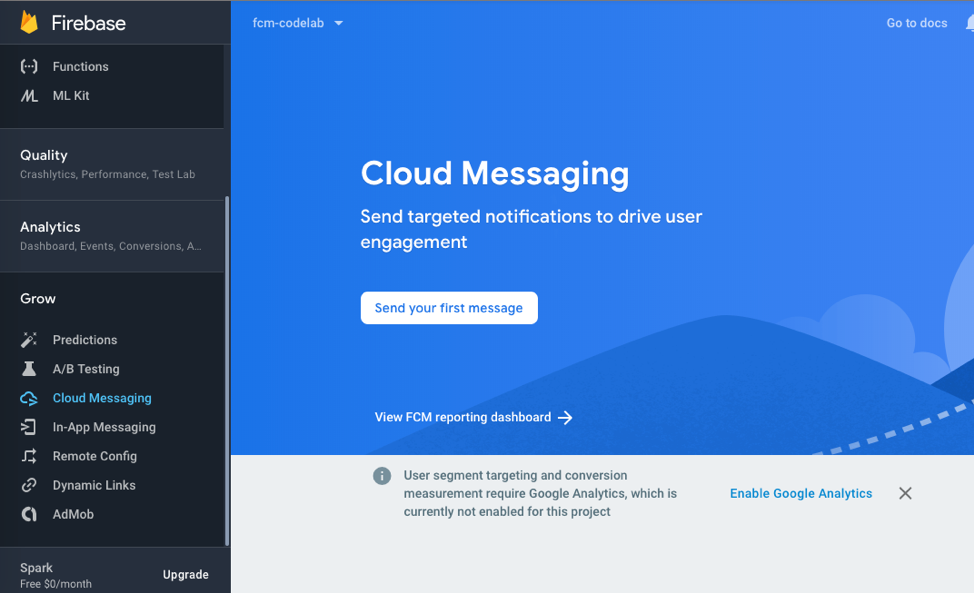
Now you can test by sending a notification.
- In order to send a notification we will use the Notification Composer. Open the Firebase Console. Select Cloud Messaging from the option on the left and click Send your first message.
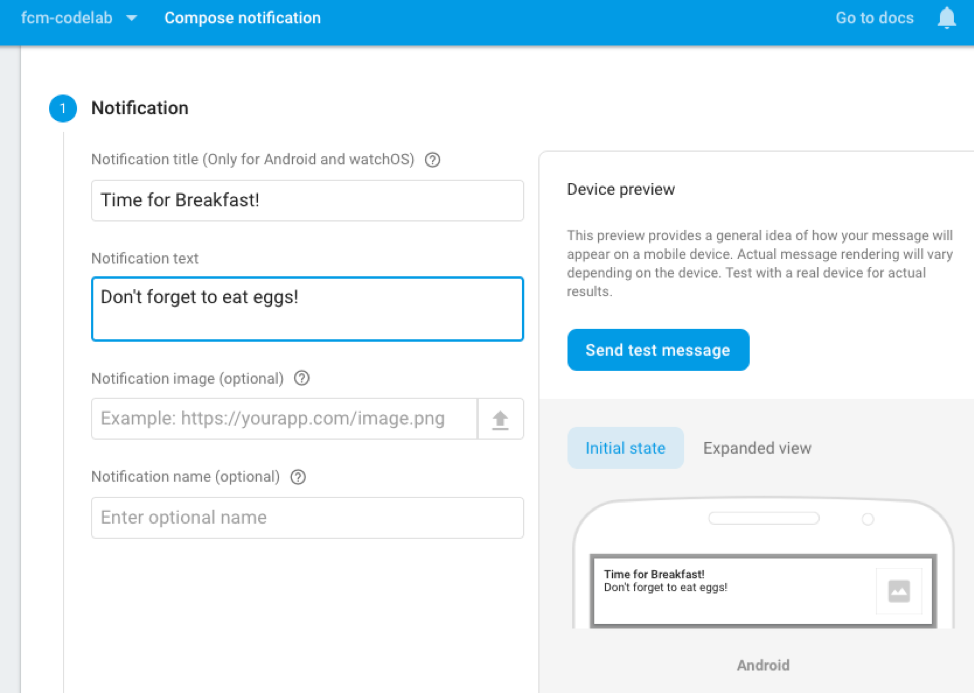
- Enter the notification title and text and select Send test message.
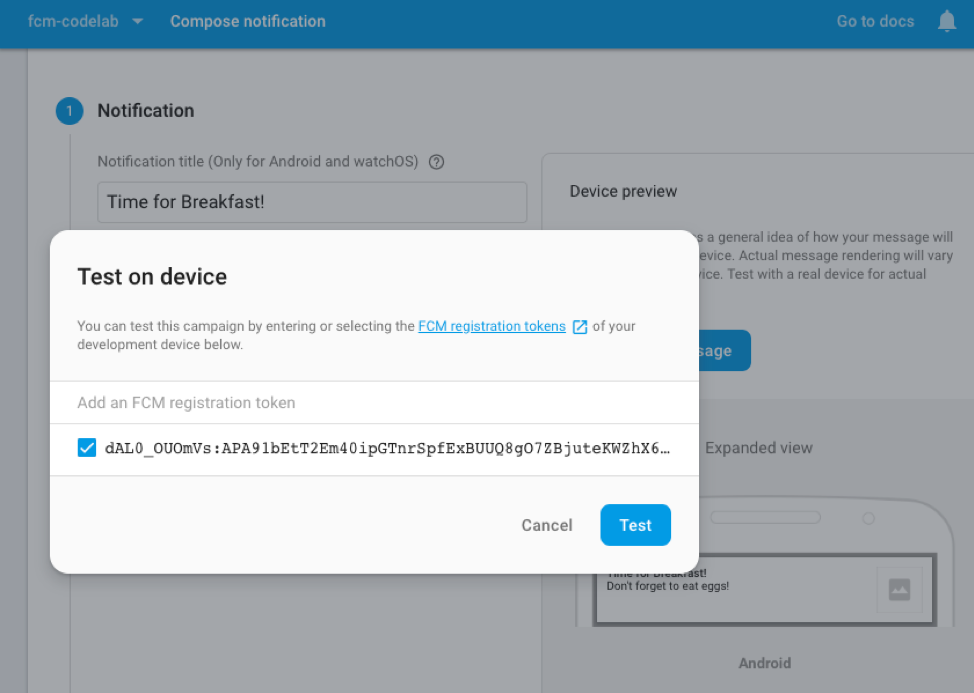
- Copy your app token from
logcatby filteringRefreshed token.

- Add and select the token from the popup window in Firebase Console. Put the app in the background and click Test.
- After you click Test, the targeted client device with the app in the background should receive the notification. You will see more on how to handle the Firebase cloud messages when your app is in the foreground later.
